

For those who have just started their journey as a Tattoo artist, the freehand tattoo on the skin can be quite challenging. Also, it requires years of experience. So if you are a beginner tattoo, there is no need to get stressed and put yourself under additional pressure. The solution to all your worries is the stencil. You can create a design over the tattoo stencil, and then with the help of the Tattoo transfer paper, you put it over the customer’s skin. There is no shame in using stencils because plenty of artists have years of experience but still use stencils. The first problem of drawing tattoos is solved. Now let’s move toward the second problem, which is tattoo stencils require a thermal tattoo copier. What do if you don’t have one? Don’t worry. In this guide, I’ll tell you how you can Tattoo Transfer Paper Without a Machine, and it’s your first to achieve the professional level. Moreover, While starting, avoid free-handling design onto the skin before you like me.
Table of Content:
- How To Transfer Tattoo Without Machine
- Benefits and Drawbacks
- How to Make a Tattoo Stencil Without Transfer Paper
- Medusu Carbon Stencil Transfer Paper
- Purpose of Layers of Tattoo Transfer Paper
- How Do You Avoid Smudging
- By Hand Creating Tattoo Stencils
How To Transfer Tattoo Without Machine?
Transferring a tattoo design onto the skin without a machine can be done using a simple process. Here are the steps to follow:
- You need to start by shaving the area where you want to apply. As a result, your tattoo will be more accurate.
- After shaving, use rubbing alcohol pads or cotton over the skin to remove dirt or oil from the skin.
- Now it’s time to cut the tattoo transfer paper.
- Apply either the thin deodorant or soap on the to make the tattoo process easier.
- You need to place the transfer paper onto the skin. However, make sure the printed side should be on the skin.
- Use the cotton pad to moisten the back of the transfer paper. But make sure your design is dry.
- Firmly press the transfer paper onto the skin. Now you need to hold it for at least 30 sec.
- Slowly and Slowly peel off the transfer paper, and you will see the tattoo is transferred on the skin.
- Now you successfully transferred the tattoo design without the printer. After waiting for a few minutes, you can start drawing your tattoo.
Note that this process may need to be repeated if the transfer needs to be clarified or if any mistakes are made. It is also important to keep the skin moisturized and clean after the tattoo is complete to prevent infection and promote healing.
Benefits and Drawbacks of Not Using Thermal Paper:
We have spent much time discussing how to use tattoo transfer paper without thermal copiers and its pros and cons. But there is something to be said about regular paper and tracing sheets. So, to give proper perspective, we have the following benefits and drawbacks of not using thermal paper and sticking to regular paper sheets:
Benefits:
Drawbacks:
Less Expensive
Regular paper is less expensive than thermal copiers.
More Difficult to Transfer
Thermal paper is specially made to trace tattoos, while regular paper makes the process more difficult.
No Special Machines
Using regular paper sheets doesn’t demand special machines to design a tattoo.
Reduced Accuracy
The accuracy significantly decreases in regular sheets if the detailing in the design is complex.
Easy To Draw
Most artists find it easier to draw on a regular paper sheet than thermal paper.
Problem with Portraits
You won’t be able to depict images or portraits on regular paper.
How to Make a Tattoo Stencil Without Transfer Paper:
If you want to make a transfer paper or stencil, the first thing you need to cover is the actual design of the tattoo. Once the design is covered, the next step is to implement that design on the stencil or transfer paper. Most people use thermal paper for the procedure, but even if you don’t have a thermal copier, you can still easily create the stencil. It’s majorly divided into two main types according to the texture of tattoo transfer paper:
Regular Paper:
- Introduction: Regular paper is another good option to replace thermal paper for design formation. All you have to do is take any regular sketchpad paper or paper sheets and draw the desired tattoo design.
- Step 1: Once you have created the artwork on one paper, take another paper and fill the surface with shading graphite pencil.
- Step 2: Now, place the design paper on the shading paper and outline the design again to add graphite to the backside of the design paper.
- Step 3: You can also use a dry ink pen or thin marker to outline the design properly.
- Result: That’s how a regular paper is tuned into a tattoo transfer sheet.
Tracing Paper:
- Introduction: Creating a stencil from tracing paper is most convenient if you don’t have a thermal copier. But, you require three paper sheets for this process.
- Step 1: The first sheet should be tracing paper where you design the tattoo, the second sheet should be a brown sheet to prevent graphite on tracing paper, and the last sheet would be graphite sheet, which would be outlined.
- Step 2: Now, you design the tattoo with a pencil without brown paper to sketch the initial artwork.
- Step 3: After that, you add brown paper and use a dry ink pen instead of a graphite pencil to outline the tattoo design properly.
- Result: And this is how you have homemade tattoo stencil without transfer paper in simple and easy steps.
Medusu Carbon Stencil Transfer Paper
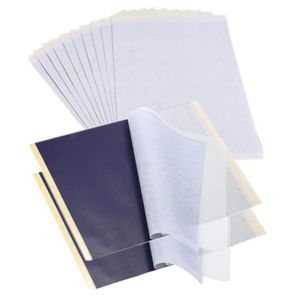
Medusu’s Transfer Paper is a reliable and efficient solution for transferring tattoo templates onto the skin without needing machines or thermal copiers. The expert at the production made sure to make it equally beneficial for both beginners learning tattoo artistry and professional and experienced tattooists. It helps make a comfortable, precise, high-quality transfer paper for further tattooing procedures. If you already have the best quality design, the next tattooing process via a rotary tattoo machine becomes easy.
The tattoo transfer papers come with a 4-layer composition, which includes main paper, protective paper, actual carbon paper, and backing paper. This multilayer transfer paper packaging allows you to protect and preserve the tattoo design. Most users want a product that can be drawn by hand using a sketch pen and also used on a thermal copier. So, you can comfortably use it manually or via a tattoo transfer machine and its performance and tattoo quality would remain consistent throughout.
Final Thoughts:
Using transfer paper for tattoos, you can maintain quality and consistency to achieve the best results. The Medusu Carbon Stencil Transfer Paper is a perfect and essential part of a tattooing kit because it is comfortable to use while maintaining a quality experience. There are 12 sheets in the packaging, so, there are enough to practice and make masterpieces tattoo ideas using a pen and paper. Whether you are new to tattoo sketching or a veteran, this transfer paper would work equally beneficial for you.
Features:
- 4-layer composition
- High-quality dye and tattoo template paper
- Non-toxic and odorless experience
- A4 size with 12 sheets in each package
- Pros:
- Best for hand usage or thermal copier
- Versatile usage for tattooing methods
- Safe and comfortable
- Cons:
- Carbon paper may smudge if not handled carefully
Purpose of Layers of Tattoo Transfer Paper:
Keep in mind that every piece of tattoo drawing paper has its purpose:
- First layer: It has a wide master sheet where you should apply the design
- Second layer: The brown protective sheets prevent some master sheets from getting carbon on them.
- Third layer: purple carbon or ink layer paper
- Fourth layer: white and yellow back paper protects the carbon paper and provides stability. ( this layer may not be present in the three-layer hand’s tattoo thermal paper, but if you are using four-layer thermal paper, it will be there )
How do you avoid Smudging While Working with a Stencil?
Once you have applied the tattoo to start well enough to resist smudging, no such tattoo is smudge-proof. Especially when you start talking about large or more areas, ensure that the stencil stays on through the whole tattooing process. there are some ways to watch out your stencils stick while working on a tattoo itself
Things You Will Need For Aftercare:
- Vaseline or Petroleum jelly
- Distilled Water
- Paper Towels
Pro Tips:
- To wipe away the smudging from your tattoos, start working from the bottom right of the tattoo design up to the left; However, If you are left-handed, reverse the process. While wiping out the skin, ensure the ink is only removed from the untattooed stencil. You can never smudge what you already have a tattoo. If you wipe on your stencil, then try to clean it off, and it will erase the stencil along with the ink.
- Keep your hands on the stencil because the ink quickly responds to thermal transfer. In other words, Placing your hand on the stencil while tattooing will rub off the customer and onto you.
- Apply a light layer of Vaseline or Petroleum jelly to the whole tattoo when dried. It will prevent excess ink and create a protective layer over the tattoo.
- Rather than using green soap on paper, use heavily diluted green soap. As a result, it will remove the blood and ink while less damaging the tattoo.
By Hand Creating Tattoo Stencils
By hand drawing, tattoo stencils have become an old-school method in the tattoo world. However, many professional artists still choose this option because it builds the muscle memory of design before you attempt a tattoo over your skin that thing you are going to need:
Hand Stencil Tutorial
- You can either print or draw your image on regular white paper. However, if you are drawing the picture, photocopy it to keep the original unchanged and use it in the future.
- The brown protective paper is also called onion paper. Remove it and place the image above the carbon paper.
- You can trace your image with a pen or pencil. First, however, press down hard enough to stick the ink back to the white paper.
- Now you will see that the images reflect clearly on the back of your design in carbon ink.
- Cut out the photo to make it ready for transfer to the client’s skin.
Pro Tip: Never outline the image while stenciling a portrait of realism in general. The stencil is just there to guide you on where you should put shading and not where you should put lines. Generally, a solid line on the stencil shows that you will tattoo a hard line. On the other hand, dotted lines on the stands marked where your shading should go. You can use a dot or stripping where the shading and lines are placed to keep the Portrait from getting too dark on the skin. As a result, this will keep your image softer and prevent your tattoo from looking like a cartoon outline. In short, you no longer need a stencil copier.
Frequently Asked Questions:
You will need a printer, tattoo transfer paper, a clean surface, and some rubbing tools such as a cotton swab or a rubber brayer.
Print the design onto the transfer paper using a standard inkjet printer. Ensure that the design is printed in reverse.
Place the printed transfer paper onto the clean skin and rub over the entire design using a cotton swab or rubber brayer.
It would be best to wait until the thermal transfer paper tattoo was completely dry before peeling it off the skin.
You should use laser tattoo transfer paper which is designed specifically for tattooing.
Yes, you can use the transfer paper without a machine.
Popular tattoo ideas for men and women that can be easily transferred using tattoo transfer paper without a machine include simple geometric shapes, words or phrases, and small symbols such as stars, hearts, or anchors. Other popular tattoo ideas include minimalist designs, animal or nature-inspired artwork, and abstract or floral motifs.
Conclusion:
I hope this article helps to learn How to Use Tattoo Transfer Paper (Design and Transfer Tattoos), and if you have any further questions, let us know. In conclusion, tattoo transfer paper is incredibly useful for aspiring tattoo artists. It is easy to use and provides a great way to practice and perfect one’s technique without needing a tattoo machine. It is also important to take proper safety precautions and ensure the paper is of good quality. Anyone can use tattoo transfer paper to create beautiful tattoos with some practice.
Read More:
How To Use Thermal Transfer Paper?
How To Use Tattoo Transfer Paper Without Thermal Copier?
Leave a Reply